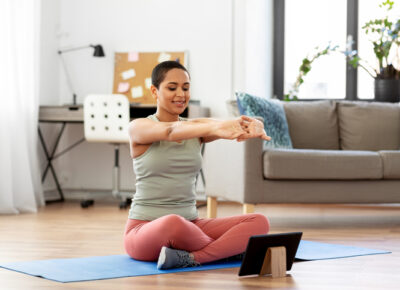
At Moorestown Spine Sports and Wellness, we incorporate wellness activities into your treatment plan for improved outcomes sometimes it can as much as a simple yoga pose. Research suggests that yoga is a great way to help people with chronic pain safely increase their physical activity and improve both mental and physical health. Yoga is accessible (you do not need a gym membership to perform the exercise), it helps to reduce inflammation, stress and anxiety and it can help to improve flexibility. Here a number of suggested Yoga poses that could help you to manage your pain.
Suggested Yoga Poses for Back Pain. Do not start an exercise program without consulting a physician.
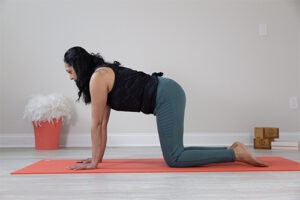
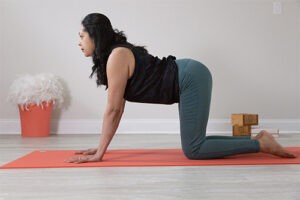
Cat/Cow Pose
Cat-Cow, or Chakravakasana, is a yoga pose that is said to improve posture and balance — ideal for those with back pain.
How to do Cat/Cow Pose
- Begin on your hands and knees in table pose, with a neutral spine.
- As you inhale and move into cow pose, lift your sit bones upward, press your chest forward and allow your belly to sink
- As you exhale, come into cat pose while rounding your spine outward, tucking in your tailbone, and drawing your pubic bone forward.
- Release your head toward the floor — breath in on cat pose and breath out on cow pose. Repeat 5x or as many as you want.
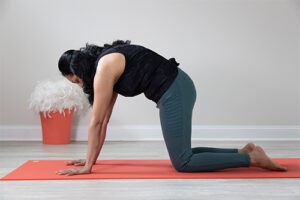
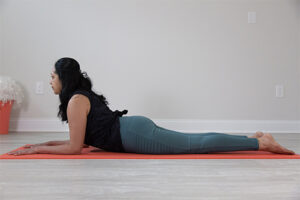
Sphinx to Press Up
Next lie on your stomach. Sphinx & Press up are milder forms of backbends that can safely be done to stretch your back.
How to do Sphinx Pose
- Lie on your belly with you forearms on the mat. Align your elbows just underneath your shoulders. Separate your feet and legs to hip width apart.
- On an inhale, begin to lift your chest away from the floor, lifting into spinal extension. Draw your lower belly in a little and hold this extension for a couple breaths. Then release from the posture and repeat as needed.
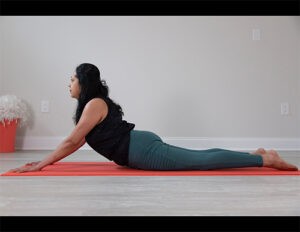
Press Up’s
With your belly and forearms on the mat, now slide your forearms forward (away from your body) and then lift your chest off the mat into a press-up. If your body can tolerate it, repeat press ups several times to stretch you lower back. Press Ups are common in physical therapy exercises for lower back pain.
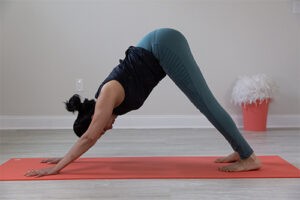
Downward Facing Dog
Now get in the position of Downward Facing Dog. The benefits of Downward Facing Dog include spine lengthening and toning of the abdominal muscles.
How to do Downward Facing Dog
- Start on all fours, with your wrists under your shoulders and knees under your hips. Keep your feet flat (toes not tucked).
- Walk your hands out a few inches in front of your shoulders and curl your toes under.
- As you inhale, press into your hands and straighten your legs, leading with your tailbone; it should be the highest point of your body and lead you into making a triangle with your body and the floor.
- Widen your upper back while keeping your arms straight and firmly in your shoulder sockets.
- Pull the front of your rib cage in as you press down into all 10 fingers and extend your heels toward the floor. (Your feet may not be flat on the floor, and that’s okay; simply press them as if you’re trying to get them flat.) Pedal your feet out if your legs feel tight.
- Take 5 deep and even breaths as you hold this pose.
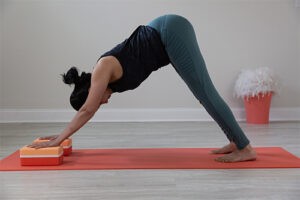
- You can use blocks for a deeper shoulder stretch.
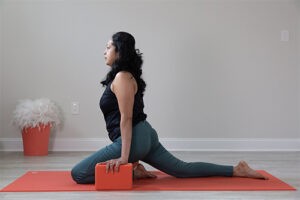
Pigeon Pose
From Down dog, you will now get into Pigeon Pose. This is a yoga asana (pose or position) that helps open your hips and ease lower back pain. This pose focuses on opening your hips, which supports mobility and flexibility in that joint. Pigeon Pose also stretches your hip flexors and lower back, which are commonly tight due to prolonged sitting.
How to do Pigeon Pose
- Lift your right leg off the ground and bring your right knee and place it just behind your right wrist.
- Slide your left leg back and start to lower your hips onto the mat while trying to keep your hips square. (Use a blanket or two under your hips if needed to help keep the hips square, or if your hips don’t comfortably lower all the way to the mat.)
- Bring your hands alongside your body and place them directly on the mat or use blocks, and hold your torso up for a few breaths
- Then start to walk your hands forward and lower your torso towards the mat (again using blocks for support if needed to place your hands onto). This will also provide a deeper hip stretch.
Repeat on the other side.
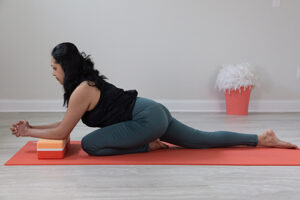
Child’s Pose

Now you want to take a break and get into Child’s Pose. Child’s Pose is a wonderful way to tune into and relax your body. It lengthens and stretches your spine, promoting flexibility and openness in your hips, thighs and lower back.
How to do Child’s Pose
- Start on your hands and knees. Bring your knees together and sink your hips back onto your heels.
- Extend your arms in front of you or allow them to rest alongside your body.
- Allow your torso to relax completely as you fall heavy into your thighs.
- Focus on deepening your breath to relax any areas of tightness or sensation.
- Hold this pose for up to 5 minutes.
Supine Twist
Now you will lie on your back. The Supine Twist an accessible exercise that can relieve tension and tightness in the lower back. It also stretches your hips.
How to do the Supine Twist Pose
- Lie on your back and bring both your knees close into your chest.
- Take your arms out into a T-Position and let both your knees drop onto the right side on the mat while you turn your gaze to look towards your left fingertips. Hold that twist for a few breaths.
- Bring both your knees back to the center and close to your chest, and then allow the knees to drop to the left side this time while turning your gaze to look towards their right fingertips.
- Inhale and return to the starting position.
- Continue this movement for 1 minute, alternating between the left and right sides.

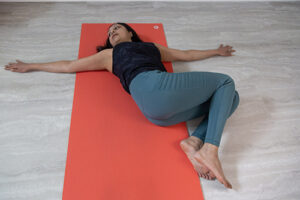
Savasana
This is typically done at the end of every yoga session. It is done for resting and restorative purposes. Lie on your back with you arms resting comfortable beside you. You can grab blankets or blocks to help you get more comfortable. Just lie still here for a few moments and concentrate on your breath. Inhale and Exhale. You can try a mediation app to help with calming sounds.
I recommend you try to do these poses daily. For more in depth yoga, I recommend you attend yoga sessions in person. If you are interested in virtual lessons, please check out https://www.simpleholisticyoga.com/ run by Minal, who is in the pictures above. She is a certified yoga instructor.
